Installation with OneDeploy
Assignment
"The board chose OpenNebula," Simone Wyss writes. "The software is free, it comes from Europe and it runs on our three servers. Can you install it in a way we can repeat any time we add a server? And please write down what runs where afterwards, so we still know a year from now."
Learning goals
After this chapter you can:
- Explain how Ansible works with inventories, playbooks, tasks, modules, roles and handlers
- Run a small playbook of your own and recognize idempotence in its output
- Describe how OneDeploy is organized
- Install OpenNebula 7.4 with one run of OneDeploy
- Name the services that run on the front-end and the nodes afterwards and how they work together
- Read the message of a run that stopped and fix the problem
Ansible
Section titled “Ansible”You could set up a cloud of three servers by hand. With thirty servers, or with a server that has to be rebuilt after a failure, that becomes slow and error-prone. Configuration management tools therefore describe the desired state of the servers in files and bring the servers into that state. Ansible is one of them, and it is the tool the OpenNebula project uses to automate its installations.
Ansible needs no agent. The target machines only need SSH and Python. Ansible runs on a control machine, in your lab the front-end. From there it connects to the targets, copies small programs over, runs them and deletes them again. This is called a push model because the control machine initiates the changes.
Ansible describes target states. A shell script says "install package X". An Ansible task says "package X is installed". If that is already true, Ansible does nothing and reports ok. If it has to change something, it reports changed. This property is called idempotence. You can repeat a run as often as you like and get the same result.
| Term | Meaning | Example from the lab |
|---|---|---|
| Inventory | list of target machines, in groups, with variables | inventory.yml with the groups frontend and node |
| Playbook | YAML file with one or more plays | opennebula.deploy.main |
| Play | assigns roles or tasks to a group of machines | "the role kvm on all nodes" |
| Task | a single step that uses a module | "package opennebula-node-kvm is installed" |
| Module | the program that carries out a task | apt, copy, template, service, user |
| Role | bundle of tasks, templates, defaults and handlers for one job | database, opennebula/server, gui, kvm |
| Handler | task that runs only when another task changed something | restart a service after its configuration changed |
| Variable | value that controls tasks and templates | one_version: "7.4" |
| Facts | information Ansible gathers about a target | Ubuntu version, number of CPUs, network cards |
| become | switching to another user, usually root with sudo | ansible_become: true |
| Collection | packaged bundle of roles, modules and playbooks | opennebula.deploy |
OneDeploy
Section titled “OneDeploy”OneDeploy is an Ansible collection by the OpenNebula project. It installs a cloud from a front-end and several nodes, optionally with high availability, Ceph storage or a routed network. The course is tested with the version release-1.4.1 and uses only its simplest layout with local storage.
The playbook opennebula.deploy.main has two parts. The part pre prepares all machines. It checks Python and the machine names, distributes SSH keys and sets up time synchronization and logging. The part site then installs OpenNebula. It consists of plays for the groups of the inventory:
- All machines with the role
common, shared packages and the OpenNebula package source - The front-end with the roles
database,opennebula/server,gate,flow,formandgui - The nodes with the roles
kvm,datastore/nodeandnetwork/node - The front-end once more with
datastore/frontendandnetwork/frontend, which create the datastores and networks and register the nodes as hosts
Roles for features the inventory does not turn on, such as Ceph, a routed network or Prometheus, are skipped. They show up as skipping in the output.
Setting up OneDeploy
Section titled “Setting up OneDeploy”The script lab/one-deploy/install.sh installs Ansible from the Ubuntu packages, fetches OneDeploy at the course version into ~/cc-lab/one-deploy and installs the Ansible collections OneDeploy needs. The guide Using the Playbooks in the OneDeploy wiki shows the same steps one by one.
~/cc/lab/one-deploy/install.shmkdir -p ~/cc-labif [ ! -d ~/cc-lab/one-deploy ]; then git -c advice.detachedHead=false clone --quiet --branch "$ONE_DEPLOY_RELEASE" https://github.com/OpenNebula/one-deploy.git ~/cc-lab/one-deployficd ~/cc-lab/one-deploy# ansible.cfg of one-deploy looks for collections in ./ansible_collections onlyansible-galaxy collection install -r requirements.yml -p ./ansible_collections >/dev/nullecho "one-deploy $(git describe --tags) is ready in ~/cc-lab/one-deploy"While it installs the collections, Git reports a "detached HEAD" state. OneDeploy requires one collection at a fixed version, so Git checks out a tag instead of a branch. The message is not an error. The script has succeeded when it ends with the line one-deploy release-1.4.1 is ready.
The inventory
Section titled “The inventory”The inventory describes your lab for OneDeploy. The script make-inventory.sh writes it from your personal parameters, and on its first run it creates a random password for the user oneadmin, the administrator of OpenNebula. The password then lives in ~/cc-lab/oneadmin.pass.
~/cc/lab/one-deploy/make-inventory.sh > ~/cc-lab/inventory.ymlchmod 600 ~/cc-lab/inventory.yml---all: vars: # Ansible logs in as the course user and becomes root with sudo ansible_user: $(id -un) ansible_become: true one_version: "7.4" one_pass: "$(cat "$PASS_FILE")" # one-deploy checks that every VM resolves the names of all others, prepare.sh wrote them ensure_hostname: true ensure_hosts: true # Images reach the nodes over SSH, no shared storage is needed ds: mode: ssh
frontend: hosts: # Ansible runs on the front-end, so it reaches the front-end itself without SSH $CC_FE_HOST: { ansible_host: $CC_FE_IP, ansible_connection: local }
node: hosts: $CC_NODE1_HOST: { ansible_host: $CC_NODE1_IP } $CC_NODE2_HOST: { ansible_host: $CC_NODE2_IP }EOFThe group frontend holds the front-end, the group node the two nodes. Since Ansible runs on the front-end, it connects to it locally instead of over SSH, as ansible_connection: local specifies. Values under vars apply to all machines. one_version sets the version of OpenNebula, and ds with mode: ssh means the nodes receive images over SSH, so no shared storage is needed. You create the networks for your members' VMs yourself in chapter 2.3, which is why the inventory has none yet. For groups, variables and connection types in an inventory, see the inventory guide of ansible-core 2.20.
Before you install, check that Ansible reaches all three VMs.
cd ~/cc-lab/one-deployansible -i ../inventory.yml all -m pingEvery VM answers with SUCCESS and ping: pong. Before that, Ansible warns for each VM that it discovered the Python interpreter on its own. You can ignore this warning.
A first playbook
Section titled “A first playbook”The course's example puts a greeting with the name of the cooperative on every node. It installs a package, writes a file with facts about the node and shows the file through a handler.
---# A first playbook: every node greets with the name of the cooperative when you log in.# Run it twice and compare the recap, the second run changes nothing.##   ansible-playbook -i ~/cc-lab/inventory.yml ~/cc/examples/ansible/motd.yml- name: Greeting on the nodes  hosts: node  become: true  # The ansible.cfg of OneDeploy turns automatic facts off, this play needs them  gather_facts: true  vars:    cooperative: Wolkenwerk Bern  tasks:    - name: Install htop to watch the load of a node      ansible.builtin.apt:        name: htop        state: present        update_cache: true        cache_valid_time: 3600
    - name: Write the greeting      ansible.builtin.copy:        dest: /etc/motd        content: |          {{ cooperative }}, {{ inventory_hostname }}          Ubuntu {{ ansible_facts['distribution_version'] }}, {{ ansible_facts['processor_vcpus'] }} vCPU        mode: "0644"      notify: Show the greeting
  handlers:    - name: Show the greeting      ansible.builtin.command: cat /etc/motd      changed_when: false
Run it twice. The first run reports changed for both tasks, and the handler runs. You see the greeting itself at your next login on a node or with cat /etc/motd. The second run reports ok everywhere and changed=0. This time the handler does not run, because nothing changed. The line gather_facts: true is needed because OneDeploy turns off the automatic gathering of facts in its configuration. The introduction to playbooks of ansible-core 2.20 covers their structure, how they run and idempotence.
cd ~/cc-lab/one-deployansible-playbook -i ../inventory.yml ~/cc/examples/ansible/motd.ymlInstalling OpenNebula
Section titled “Installing OpenNebula”A run of OneDeploy takes a few minutes, between one and a half and three in the course lab and much longer on a slow network. Ansible shows every role and every task with its result per machine. OpenNebula 7.4 describes the same workflow with a control node, an inventory and playbooks in its OneDeploy guide.
cd ~/cc-lab/one-deployansible-playbook -i ../inventory.yml opennebula.deploy.main | tee ../deploy.logThe output ends with the section PLAY RECAP and one line per VM. After a successful installation every line shows failed=0. The numbers for ok, changed and skipped tell you how many tasks were already right, how many changed something and how many your lab did not need.
The installed services
Section titled “The installed services”After the run, OpenNebula is fully installed. The details below come from a lab of the course with OpenNebula 7.4.1 on Ubuntu 26.04.
On the front-end
Section titled “On the front-end”| Service | Package | Port | Job |
|---|---|---|---|
oned | opennebula | 2633 (XML-RPC), 2634 (gRPC) | the core of OpenNebula, manages all objects and offers the API that the CLI, the web interface and OpenTofu use |
| Scheduler | opennebula | a driver of oned that picks a suitable node for every new VM | |
onemonitord | opennebula | 4124 | collects the state of nodes and VMs |
| MariaDB | mariadb-server | 3306, local only | database of oned with all users, hosts, images, networks and VMs |
| FireEdge | opennebula-fireedge | 2616 | the web interface Sunstone |
| guacd | opennebula-guacd | 4822 | shows the console of a VM in the browser |
| OneFlow | opennebula-flow | 2474 | services made of several VMs with elasticity rules, the topic of chapter 3.5 |
| OneGate | opennebula-gate | 5030, local only | lets VMs report values to OpenNebula, OneFlow needs it |
| OneForm | opennebula-form | 13013 | provisions new clusters at providers, not used in the course |
| Hook manager | opennebula | 2101 and 2102, local only | runs scripts when an object changes |
| SSH agent | opennebula | holds the key of oneadmin for the connections to the nodes |
On top of that come the user oneadmin with an SSH key pair, time synchronization with chrony and the configuration under /etc/one/, mainly oned.conf. Inside OpenNebula the run creates three datastores. The datastore system with ID 0 holds the disks of running VMs, default with ID 1 the images, and files with ID 2 files such as kernels or context scripts. All three use the transfer driver ssh.
On the nodes
Section titled “On the nodes”| Service | Package | Job |
|---|---|---|
| KVM with QEMU | qemu-system-x86 | runs the VMs with the virtualization of the CPU |
| libvirt | libvirt-daemon-system | manages the VMs on the node, with virtlogd for the logs and virtlockd against disks opened twice |
| Node package | opennebula-node-kvm | creates the user oneadmin in the groups kvm and libvirt and configures libvirt for OpenNebula |
The nodes run no OpenNebula service of their own. The key of oneadmin from the front-end is listed in their authorized_keys.
Front-end and nodes working together
Section titled “Front-end and nodes working together”When you start a VM, oned records it in the database, and the scheduler picks a node with enough free CPU and memory. The front-end then connects to that node as oneadmin over SSH. The transfer driver ssh copies the VM's image into the node's system datastore under /var/lib/one/datastores/0/. Then a driver on the node starts the VM through libvirt with KVM. The drivers are small Ruby and shell programs that the front-end copies to /var/tmp/one/ on every node. That is what the handler "Sync Remotes" does at the end of a run. From then on onemonitord regularly queries the state of nodes and VMs, which oned shows in onehost list and the web interface.
Reading a run that stopped
Section titled “Reading a run that stopped”When a run stops, a line further up starts with fatal: and the name of the VM, with the message below it. Above that, Ansible shows the task that failed and the file it comes from. Read the message first, then the task. Most of the time the message already explains the problem.
While this course was being developed, the run stopped four times. Today the preparation script from chapter 0.4 prevents each of these stops:
| Message | Cause | How the course handles it |
|---|---|---|
Please make sure each cluster member can resolve all Front-end hostnames | The VMs did not know each other's names. | prepare.sh writes all names to /etc/hosts, and the inventory sets ensure_hosts. |
Could not find the requested service rsyslog.service | The minimal Ubuntu 26.04 image does not include rsyslog. | prepare.sh installs rsyslog on all VMs. |
opennebula-fireedge ... Depends nodejs (<= 21) | Ubuntu offers a newer Node.js than the web interface accepts. | prepare.sh makes Node.js come from the OpenNebula repository. |
Failed to set permissions on the temporary files Ansible needs to create when becoming an unprivileged user | On the front-end Ansible switches to the user oneadmin and needs the package acl for that. | prepare.sh installs acl on the front-end. |
After a fix, start the run again. Since Ansible describes the target state, it only changes what is not right yet.
The CLI as your user
Section titled “The CLI as your user”The OpenNebula commands such as onehost or onevm log in to the API with the user and password from the file ~/.one/one_auth. So that you do not have to switch to oneadmin every time, you create this file for your own user with the password from the inventory. Only you may read it. The CLI configuration of OpenNebula 7.4 lists the other variables and files the CLI reads.
mkdir -p ~/.one(umask 077; echo "oneadmin:$(cat ~/cc-lab/oneadmin.pass)" > ~/.one/one_auth)That is convenient for a lab. In a real cloud the platform team works with users of its own instead of oneadmin. Chapter 3.1 shows how users and groups work in OpenNebula.
Checking
Section titled “Checking”onehost list shows whether OpenNebula runs and both nodes are ready. The column STAT has to show on for both nodes. OneDeploy registers the nodes with their IP addresses as names.
onehost listsystemctl and ss show which services run on the front-end and which ports they listen on.
systemctl list-units 'opennebula*' mariadb.servicesudo ss -ltnpOpen the web interface in the browser of the client, which is the Kali VM on smartlearn or your PC if you run your own hypervisor. It listens on port 2616 of the front-end, for example at http://192.168.210.137:2616/. Log in as oneadmin with the password from ~/cc-lab/oneadmin.pass.
After you log in, Sunstone shows its dashboard.
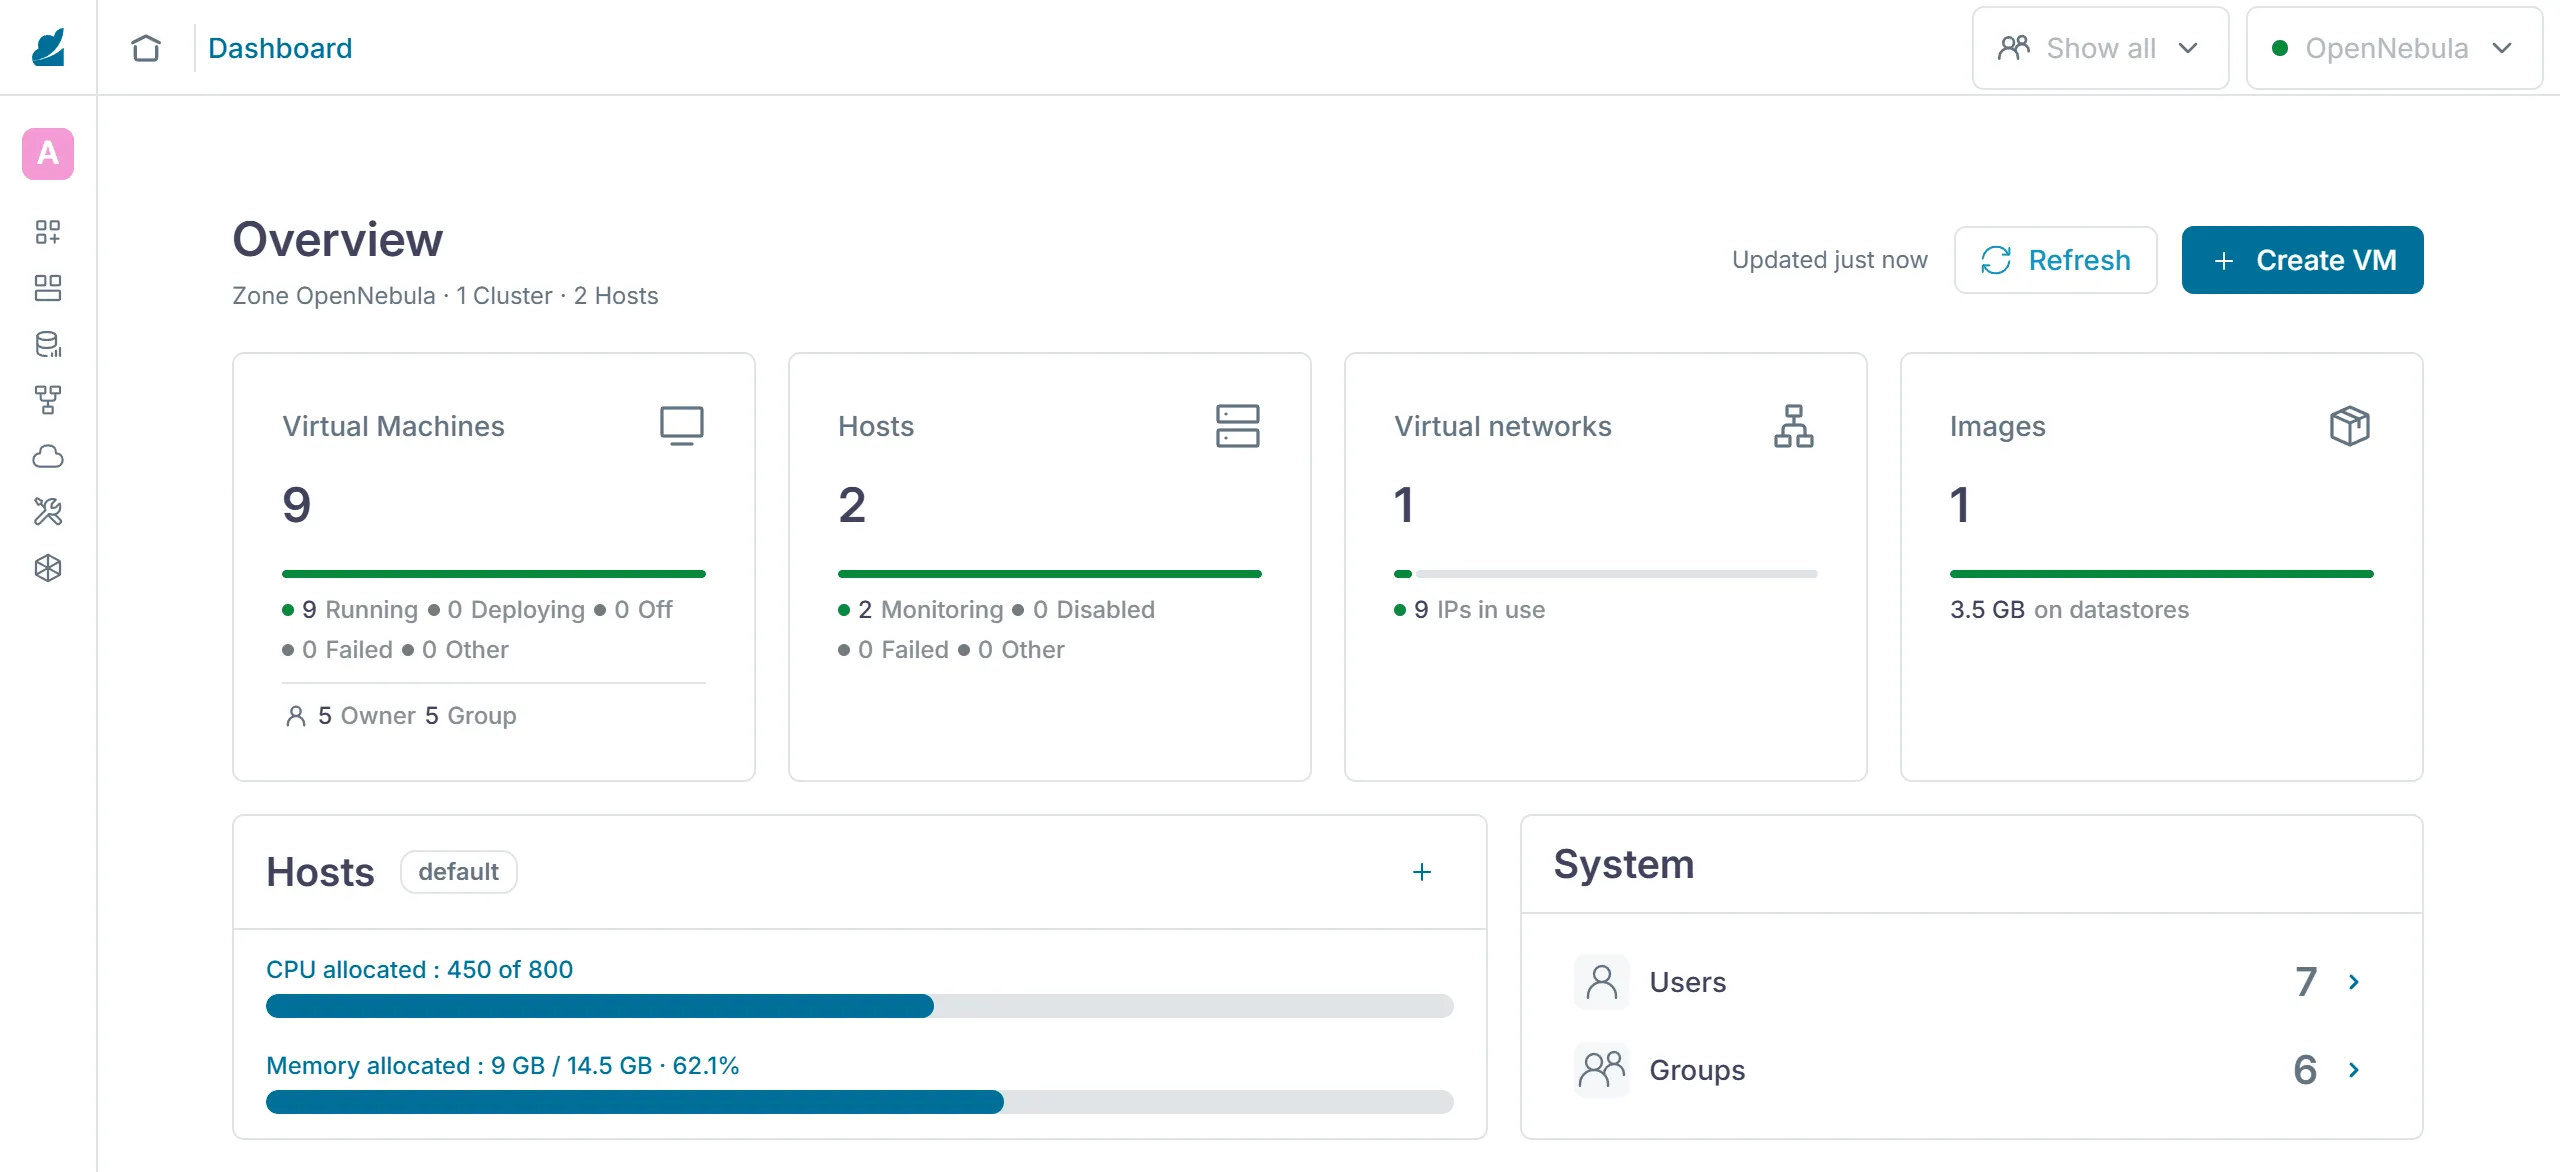
The check of this chapter covers the service, the version, both hosts and the web interface.
python3 ~/cc/checks/check.py installExercise Warm-up
Set up OneDeploy, create the inventory and run the playbook motd.yml twice. Compare the two PLAY RECAP sections and explain why the handler does not run the second time.
Solution
The first run reports changed=2 on both nodes because htop was installed and /etc/motd was written. The second run reports changed=0. Since the task "Write the greeting" changed nothing, it does not notify the handler, and the handler does not run.
Exercise Lab
Install OpenNebula 7.4 with OneDeploy, set up the CLI for your user, check the hosts with onehost list, log in to the web interface and upload the report of the check install to your hand-in repo.
Solution
The check ends with "8 of 8 base checks passed". onehost list shows both nodes with on in the column STAT. If it shows err instead, onehost show with the host's name explains why in the section MONITORING INFORMATION, often a missing SSH connection from the front-end to the node.
Exercise Deep dive
Match every port that sudo ss -ltnp shows on your front-end to a service from the table. Which ports are reachable only locally, and why does that make sense for the database?
Solution
MariaDB on 3306, OneGate on 5030 and the hook manager on 2101 and 2102 listen only locally, on 127.0.0.1. The database is needed only by oned on the same machine. If it were reachable on the network, anyone with its password could read or change all data of the cloud, bypassing the OpenNebula API. SSH on port 22 and the local DNS cache systemd-resolved on port 53 of 127.0.0.53 and 127.0.0.54 belong to Ubuntu, so the table leaves them out.
Text and figures are licensed under CC BY-SA 4.0 and the code under the MIT License. The sources are on GitHub.